How to Assign Archival Policies to Workspaces
Last updated: June 11, 2026
How to Assign Archival Policies from the Workspace Details Page
From the Workspace Management 'Reports' page:
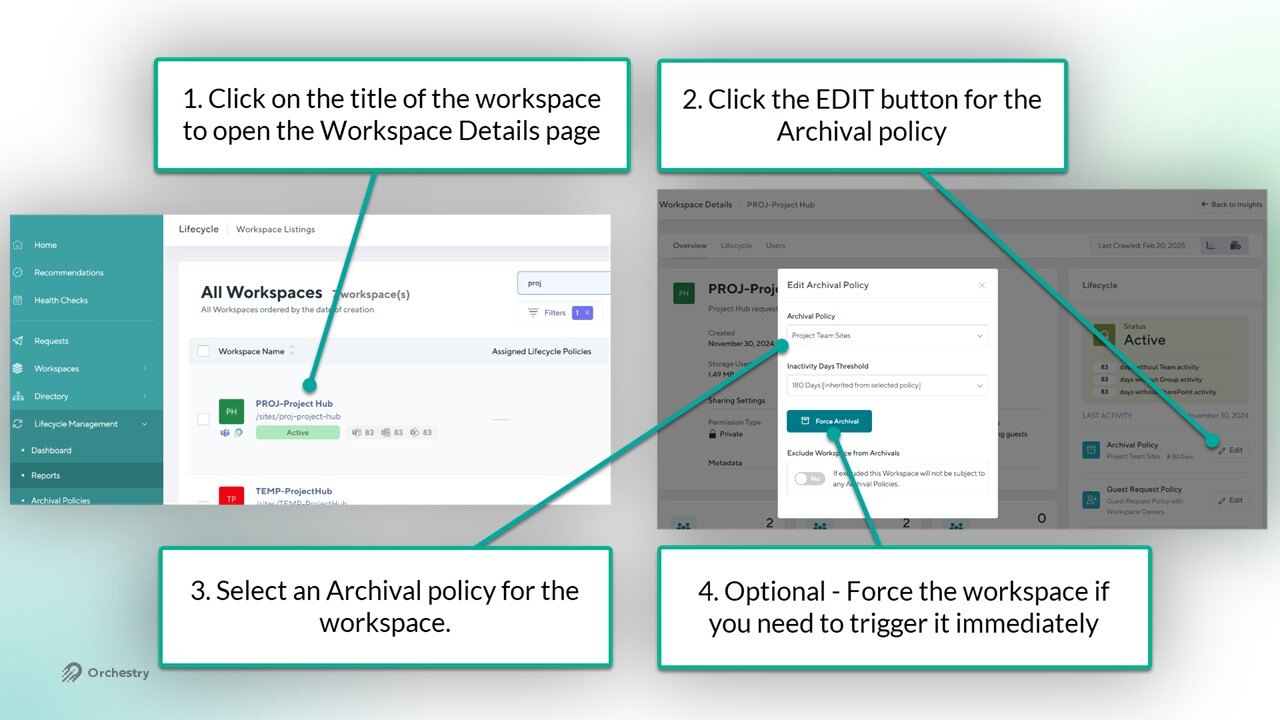
Click on the TITLE of a workspace to open it's details page
Click the EDIT button for the archival policy
Select a policy for the workspace
OPTIONAL - Force the policy if you need it to trigger it immediately
Want to learn more about the Workspace Details Page?
Check out the article: Workspace Details Page Overview
How to Assign Archival Policies from the Workspace Reports Page
Go to the Reports page (Workspaces > Reports)
Select one or multiple workspaces to assign a policy to
Click the 'ACTIONS' button
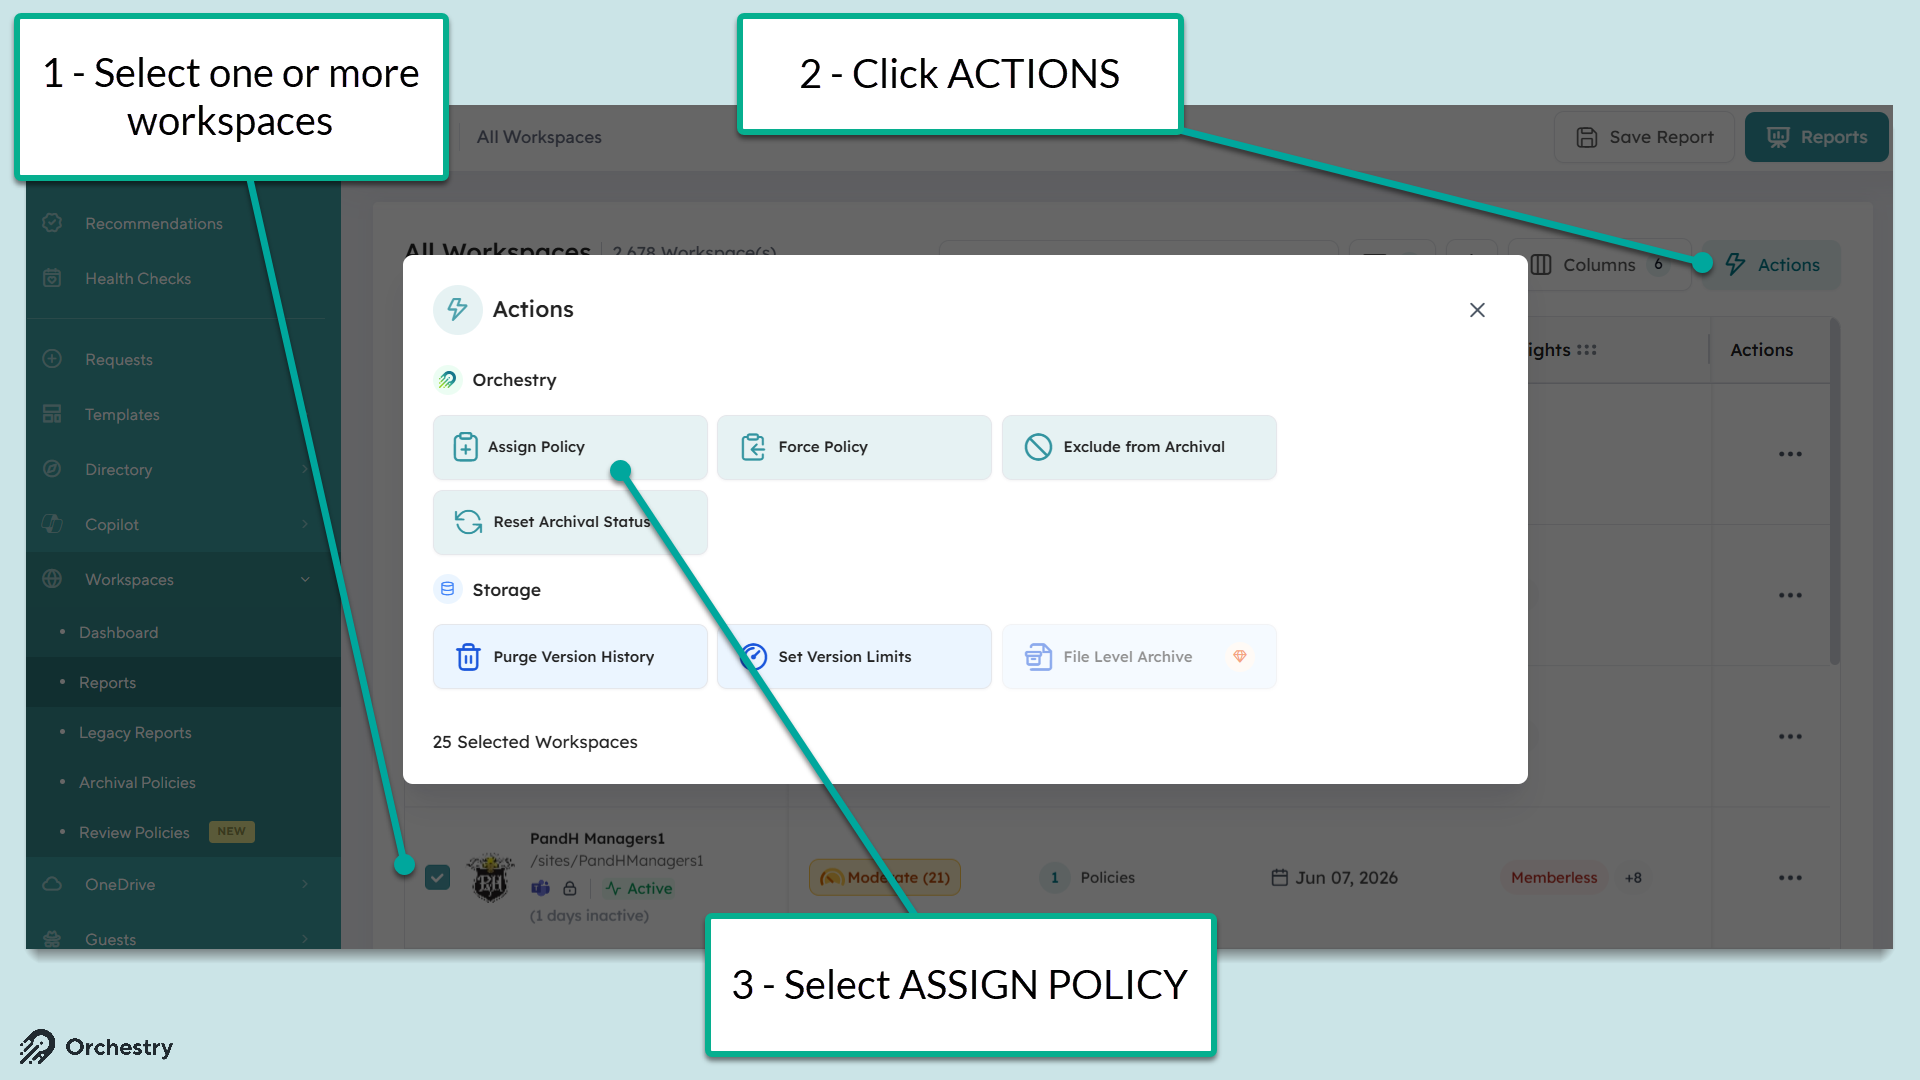
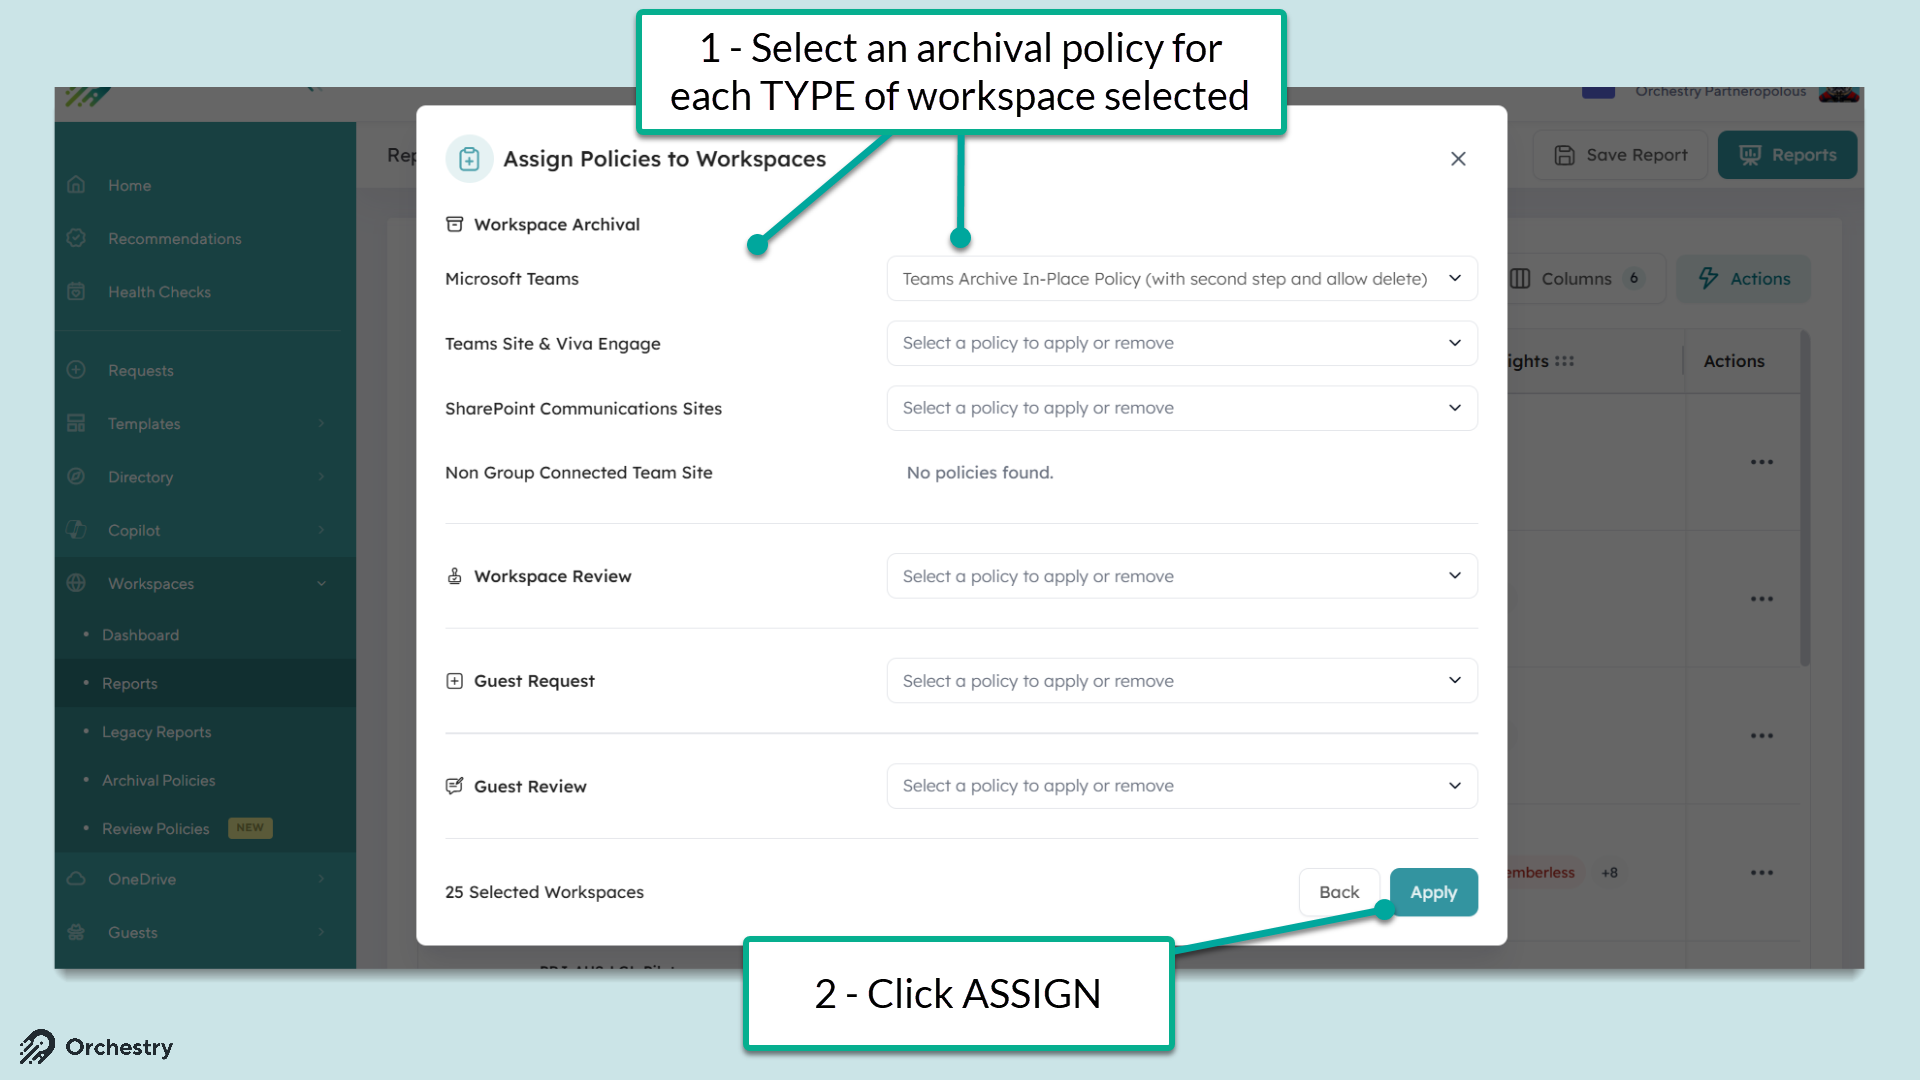
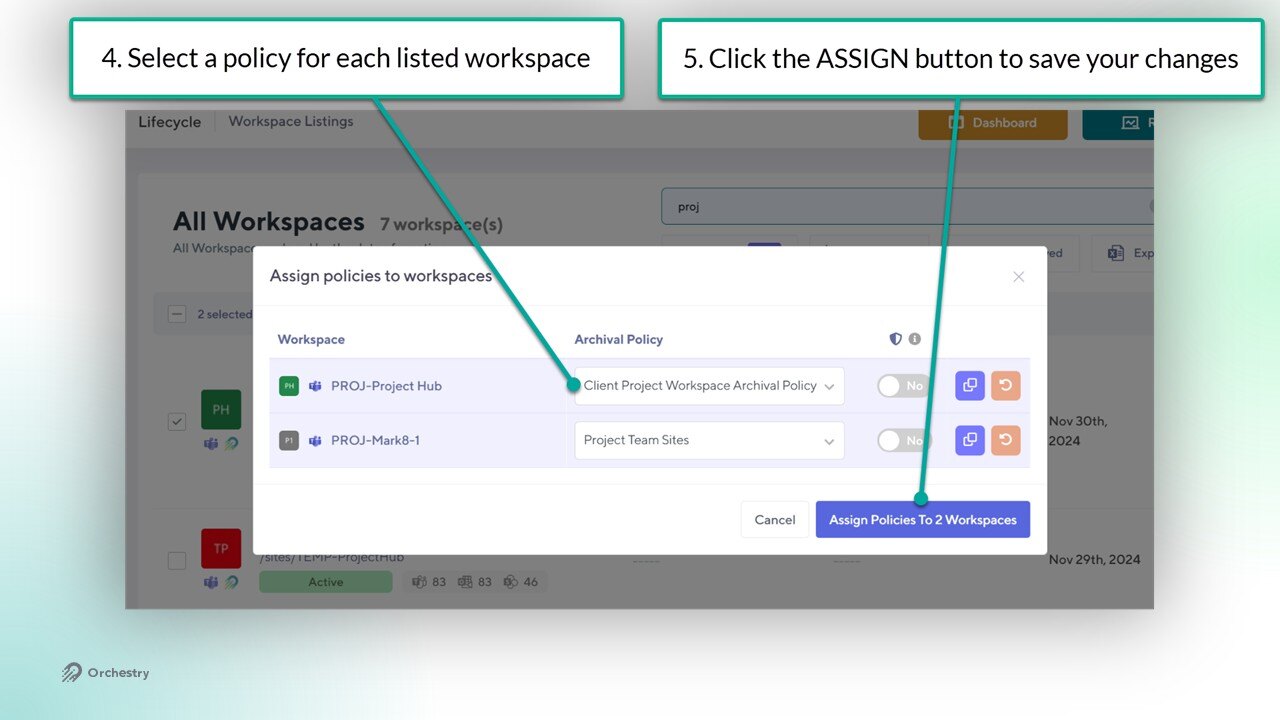
In the dialogue window that appears, select an Archival policy for each TYPE of workspace selected in the previous step
Click ASSIGN to apply the policies to your workspaces
TIP: End users do NOT get notified when policies are assigned.
How to Assign Archival Policies from the Legacy Reports Page
Go to the Legacy Reports page (Workspaces > Legacy Reports)
Select one or more workspaces from the table
From the toolbar that appears, click ASSIGN > WORKSPACE ARCHIVAL
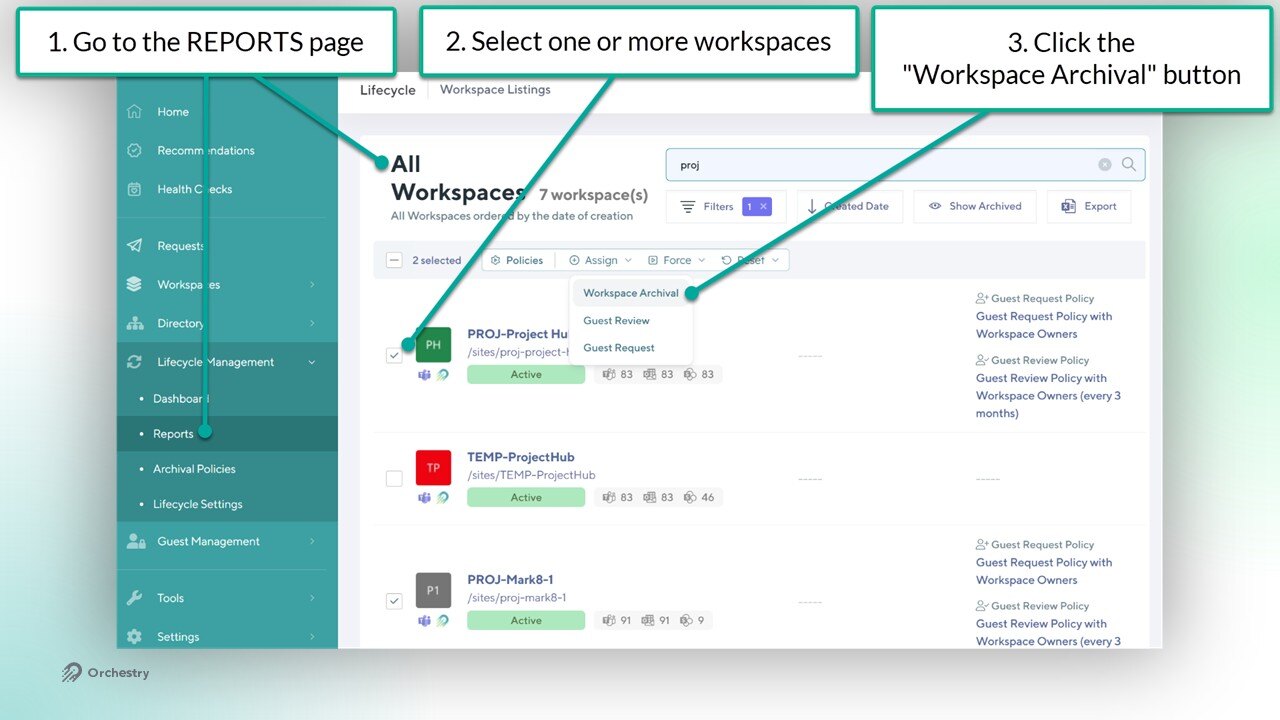
In the dialogue window that appears, choose an archival policy for each workspace you've selected
Click ASSIGN to apply the policies to your workspaces
How to Assign Default Archival Policies
Before enabling default policies, it is strongly recommended to assign the "Exclude from Archival" toggle for any workspaces that SHOULD NOT be archived or deleted.
Learn more: How to Exclude Workspaces from Archival Policies
When you designate a policy as a default, Orchestry will automatically assign it to any workspace that does NOT already have an archival policy. This can help you close gaps by ensuring all workspaces have policy assigned to them.
Go to the Workspace Settings page (Settings > Workspaces)
Choose a Workspace Type
Set the toggle to YES to enable the default policy option
Choose the archival policy to be the default for that workspace type
SAVE your changes
How to Assign Archival Policies to Workspace Templates
You can proactively ensure workspaces created through Orchestry have archival policies by adding them to the workspace template.
From the Workspace Template:
Navigate to the 'Automations' tab
Select an archival policy OR enable the 'Excluded' toggle
SAVE your changes
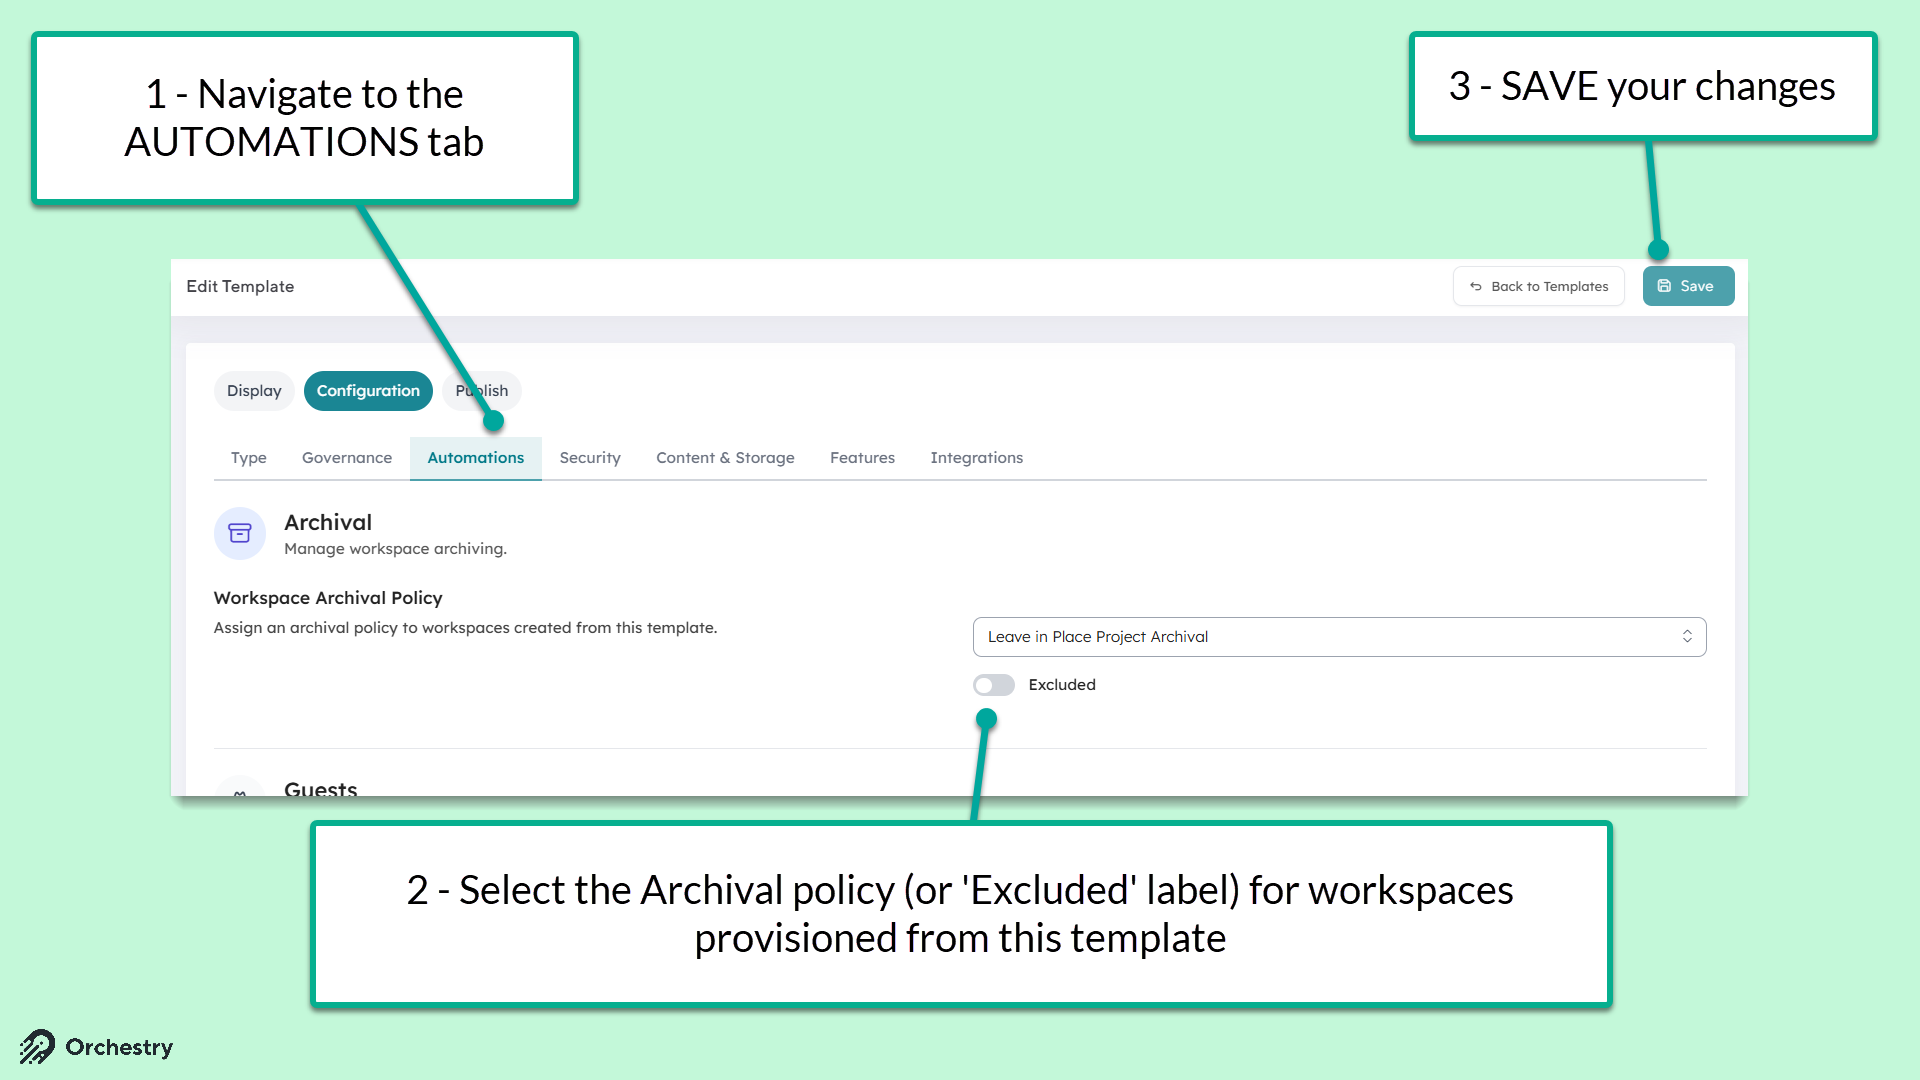
NOTE: Assigning policies to workspace templates does NOT retroactively assign policies to existing workspaces.
Assigning Archival Policies to Viva Engage Communities
Orchestry Admins should be aware of a few differences with how Orchestry is able to archive Viva Engage communities.
The community and contents (posts, polls, configurations, etc.) cannot be archived. Please consider exporting the community data before deleting these workspaces if the content needs to be retained.
Only the (group connected) SharePoint Team site, including libraries, permission configurations, and site page configurations.
Orchestry cannot set Viva Engage communities to a READ-ONLY status. If you must preserve the community, it is recommended that you configure the archival policy to:
Modify the group membership so only authorized users can access it.
Change the group permissions to PRIVATE. This way users cannot discover and re-join the group.
Hide the workspace from search and Copilot. This will further reduce unintentional discoverability of the workspace and contents