How to Install Orchestry into Your Tenant
Last updated: July 21, 2026
The Orchestry Application provides a wizard to guide you throughout the installation process.
The following details the steps in the installation process.
IMPORTANT: SharePoint site creation must be enabled BEFORE installing Orchestry. If disabled, Orchestry cannot create the SharePoint site required to store tenant data.
Learn more: Manage site creation in SharePoint - SharePoint in Microsoft 365 | Microsoft Learn
Step #1 - Login to the Installation Wizard as a Microsoft 365 Global Admin
Go to https://app.orchestry.com/install. You will be presented with button to login with your M365 credentials
Login as a M365 global admin. You cannot complete the installation without GA access
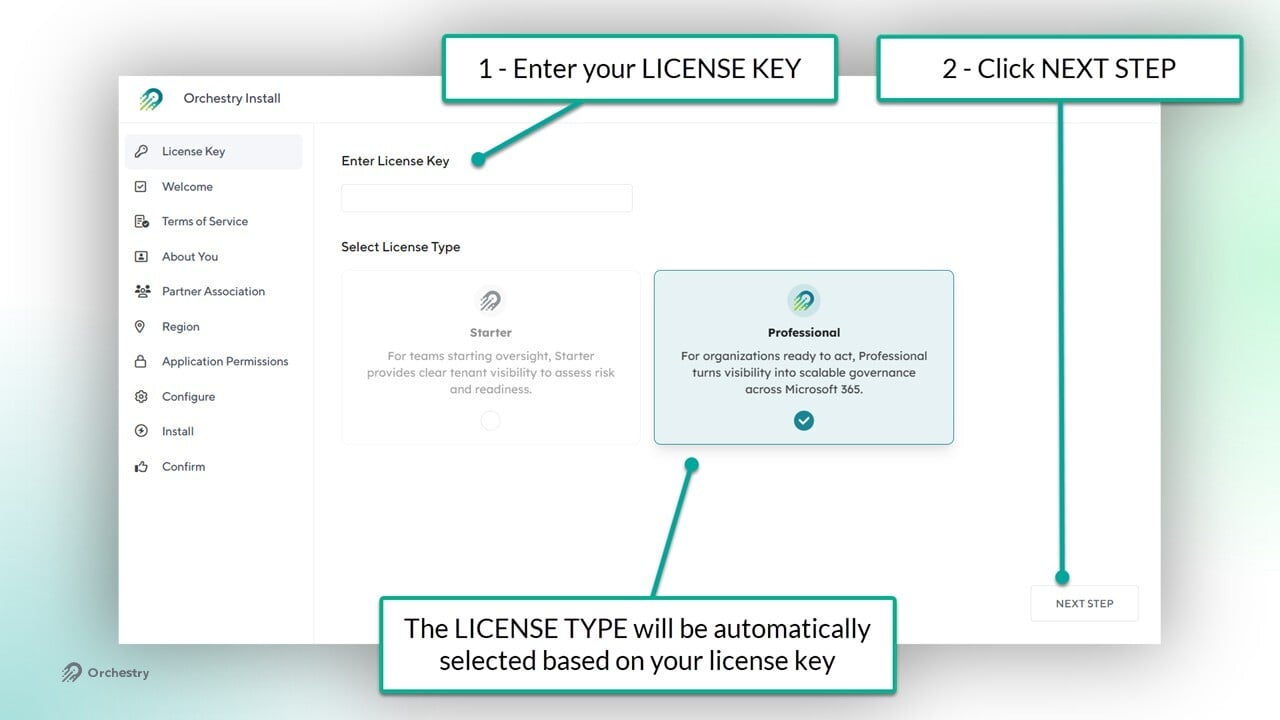
Step #2 - Enter Your License Key
Add your license key. If you don't have a license, please contact your Orchestry partner or contact us
Click NEXT to proceed
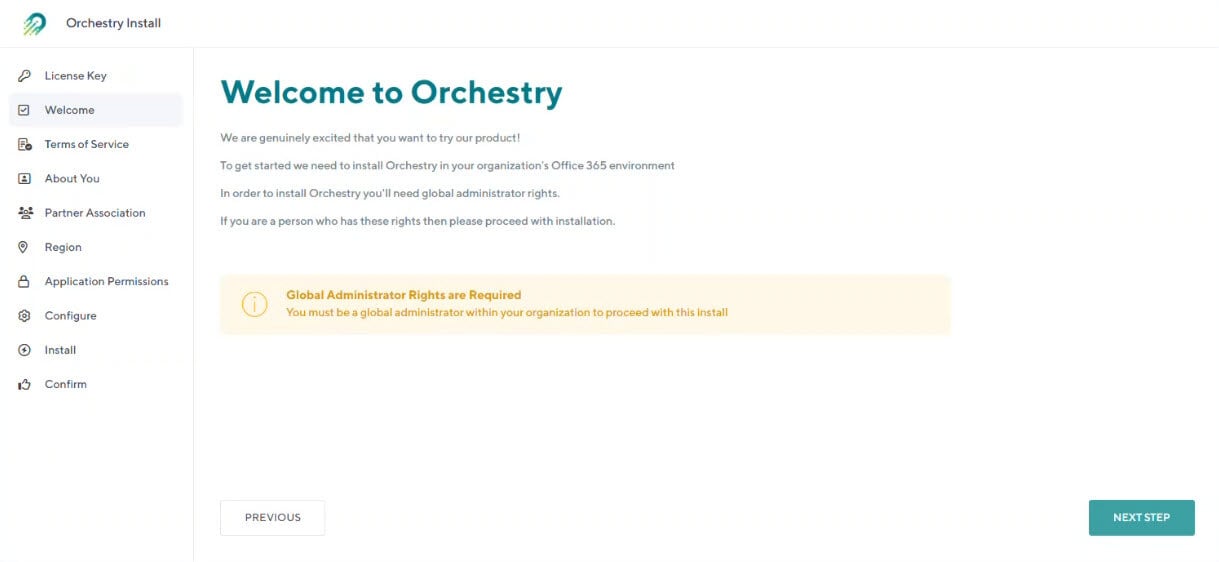
Step #3 - Welcome Page
The Welcome Page welcomes the user to the installation process and informs them that they must be a Global Administrator to proceed.
If you are logged in as a global admin, then you have no action to take on this page. Click NEXT to proceed.
Step #4 - Accept Terms of Service
Terms of Service (TOS) is displayed on this page.
Review the entire TOS
Accept the TOS
Click NEXT STEP

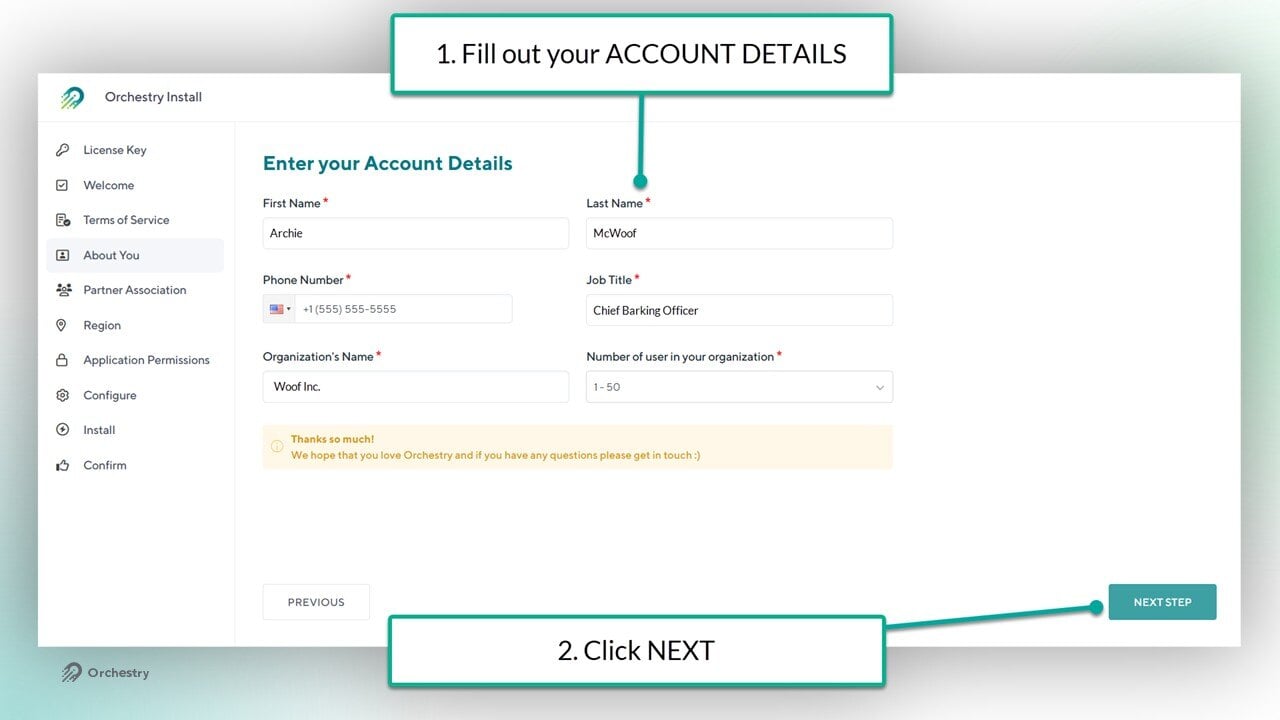
Step #5 - Provide Information /Account Details
The next step is for the user to provide their information. This helps Orchestry track the installation status and gathers additional information.
Step #6 - Partner Association (optional)
If you are an Orchestry partner (or are working with a partner), enter in the partner connection secret to allow the partner to view the tenant from Partner Tools.
Add the Partner Connection Secret (key) provided by the partner
Review and consent to the Partner Connection terms of service
Click NEXT to proceed

TIP: The partner connection can be done post-installation too.
To learn more, check out the article: How to Configure Partner Association
Step #7 - Region
On this page, choose the closest Azure data region to your organization.
Choose the region from the dropdown menu
Click NEXT to proceed

Want to learn more about the data regions used by Orchestry?
Check out the article: Orchestry Azure Regions
Note that the region cannot be changed in app settings after install. If you need to change regions, contact your Orchestry partner or submit a ticket to our helpdesk.
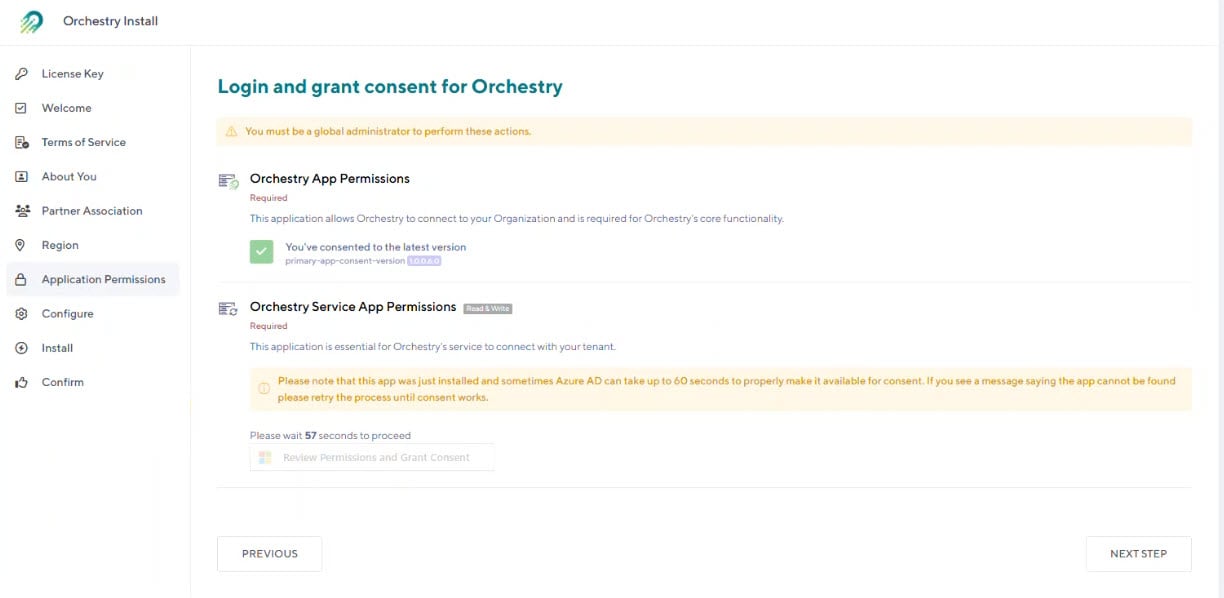
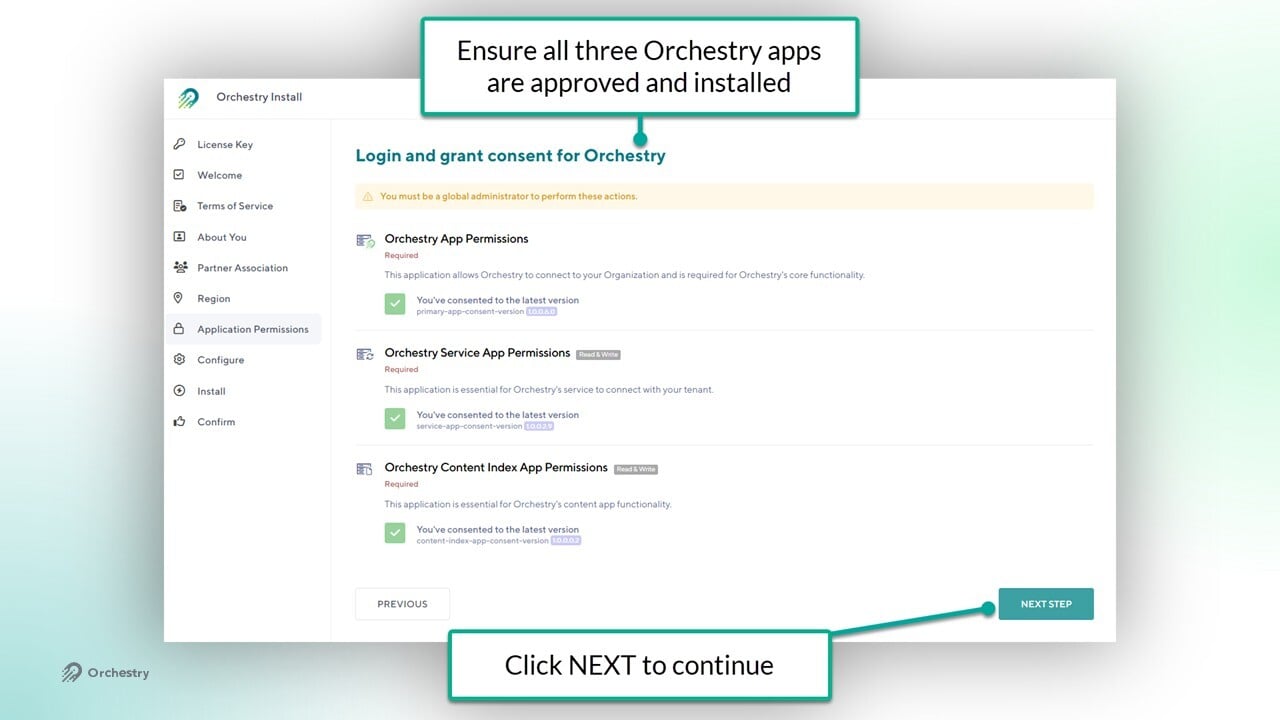
Step #8 - Application Permissions
In this step, you will grant consent for the three applications Orchestry will install in your tenant, (1) the Orchestry app, the (2) Orchestry Service app, and (3) the Orchestry Content app.
Ensure you're logged in as a M365 Global Admin
Click REVIEW PERMISSIONS AND GRANT CONSENT for the Orchestry App permissions
In the pop-up window, click 'GRANT ORCHESTRY PERMISSION' after reviewing the list of permissions the Orchestry app needs
Click ACCEPT on the formal M365 'Permissions Requested' window
WAIT for the 60-second timer to complete before proceeding.
Click REVIEW PERMISSIONS AND GRANT CONSENT for the Orchestry Service app permissions
In the pop-up window, click 'GRANT ORCHESTRY PERMISSION' after reviewing the list of permissions the Orchestry Service app needs
Click ACCEPT on the formal M365 'Permissions Requested' window
Wait for the 60-second timer
Click REVIEW PERMISSIONS AND GRANT CONSENT for the Orchestry Content app permissions
In the pop-up window, click 'GRANT ORCHESTRY PERMISSION' after reviewing the list of permissions the Orchestry Content app needs
Click ACCEPT on the formal M365 'Permissions Requested' window
Wait for the 60-second timer
Click NEXT to proceed
Want to learn more about the permissions Orchestry needs?
Check out the article: Orchestry Technical Information Overview
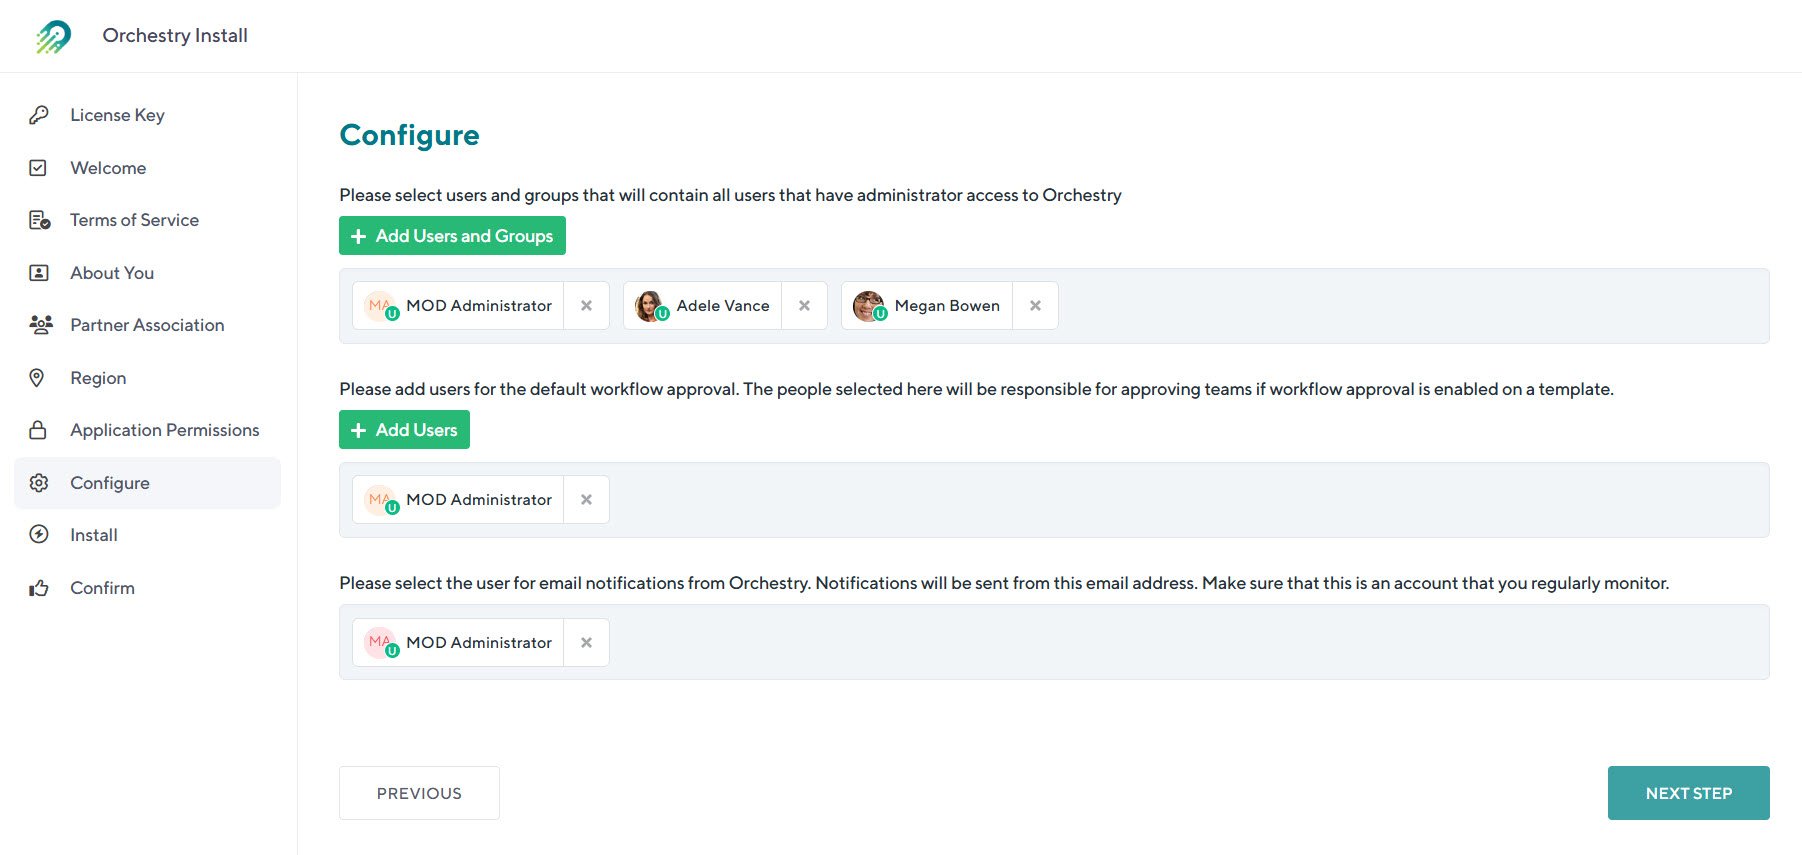
Step #9 - Configure (Accounts)
In this step some default options are shown to configure Orchestry:
Admin Access: | Choose one or more accounts that will have Administrator Access to Orchestry |
Default Workflow Approval: | Choose one or more users that will be part of the default Approval Workflow |
Email Notifications: | Choose the account that any notifications will be sent from on behalf of Orchestry. |
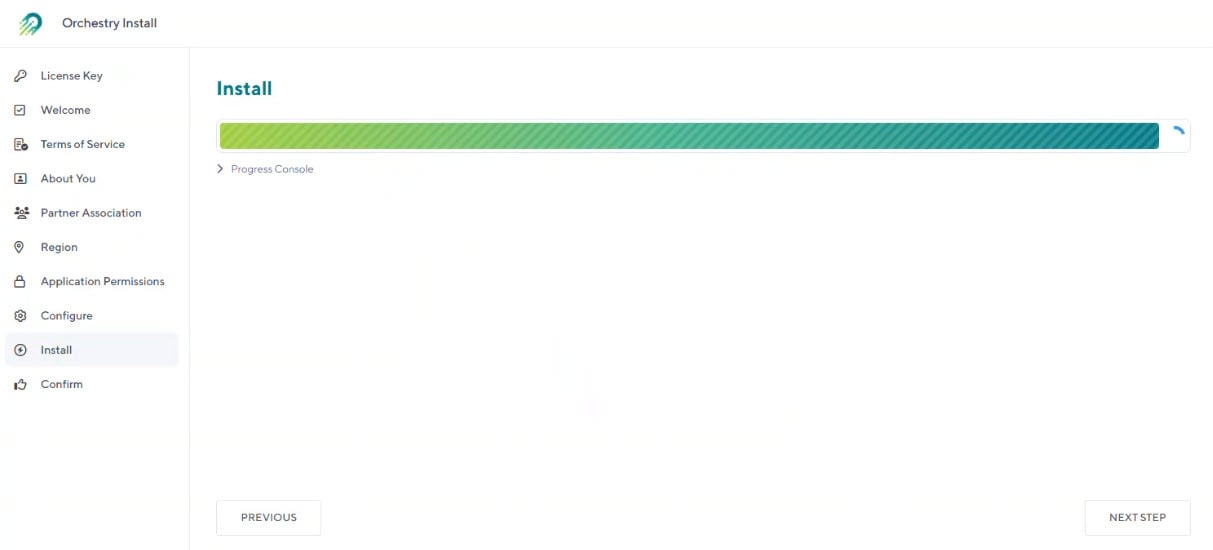
Step #10 - Installation
In this step the actual installation occurs. Once installation is complete, click NEXT STEP.
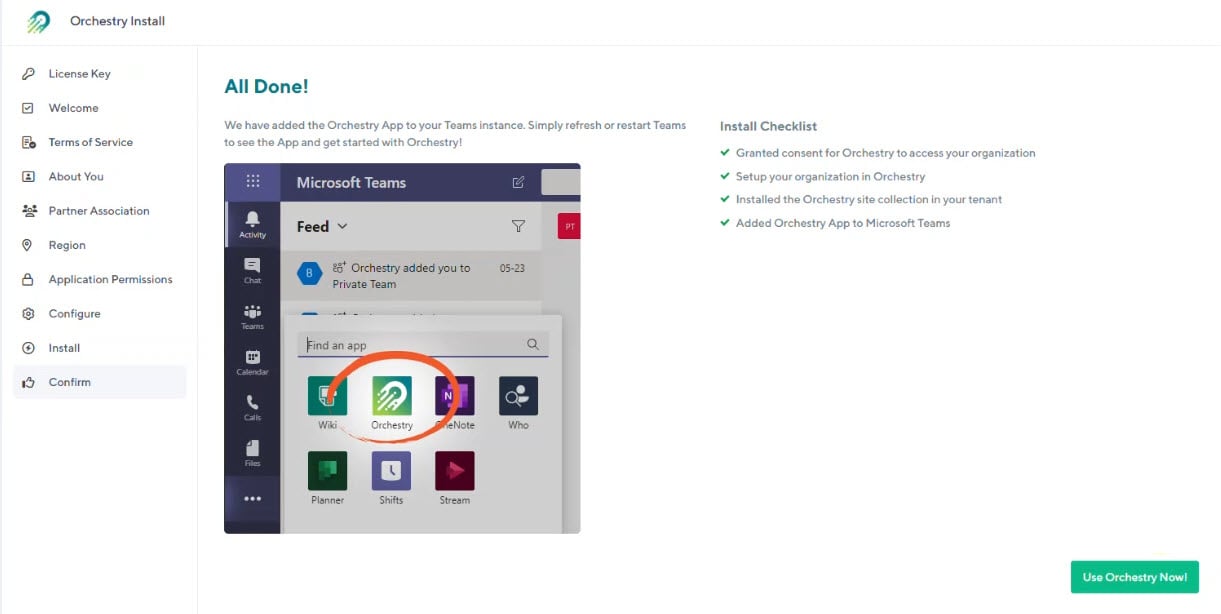
Step #11 - Confirmation
This is a page that confirms Orchestry has been installed successfully. Clicking on the 'Use Orchestry Now' will open the Orchestry app.
What is Installed in my Tenant?
Along with the Orchestry app and Orchestry Service app installed in Azure, Orchestry installs the following into your tenant:
Orchestry Configuration Database
This is installed in the Orchestry Azure Instance and holds all of the configuration information for the application. This information contains configuration options such as your Workspace Template configuration, Workflows, Naming policies and others.
Orchestry Site Collection
A Site Collection is provisioned at /sites/Orchestry that contains a Document Library to store any Document Templates as well as the Workspace Directory list that contains information to power the Workspace Directory.
Orchestry Teams Application
The Orchestry Teams Application is added as a custom application so that it can be added and used by users.
Orchestry Default Content
Orchestry will install some default content as part of the installation which includes the following:
Workspace Templates: | By default, the static Team Site, Team and Communication site templates are installed. |
Features: | Multiple features are included |
Channels: | Multiple (standard) team channels are included. |
Document Templates: | Multiple Document Templates are included. |
Approval Workflows: | A single Approval Workflow is included |
Workspace Reviews: | A single Workspace Review policy is included |
Naming Policies: | Three Naming policies are included |
Metadata: | A single metadata property is included |