Approval Workflows Overview
Last updated: March 30, 2026
Approval Workflows are a feature of Workspace Provisioning that add an approval layer to workspace requests. Orchestry admins can reduce the sprawl of duplicate and redundant workspaces by adding Approval Workflows to their workspace templates.

How to Create an Approval Workflow
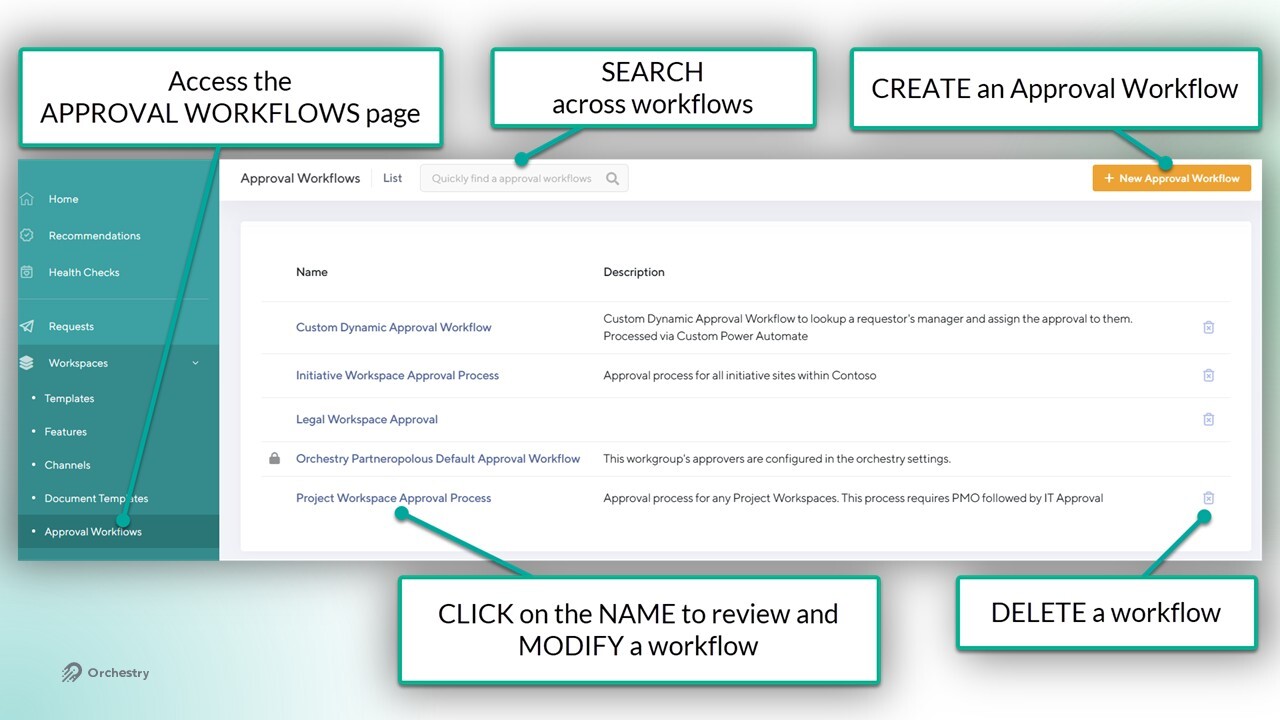
By visiting the "Approval Workflows" page, you can view, create and manage multiple workflow approvals. Each workflow can be assigned to one or many workspace templates, regardless of type.
Each approval workflow is build out of STEPS and APPROVERS.
Each STEP can have one or many approvers
Only ONE person per step needs to give approval
One ONE person needs to REJECT a request. No additional approvals will be sent after the request as been rejected.
Add MULTIPLE STEPS when multiple levels of approval are needed
You can assign (Entra) Security Groups to the approvers list
To create a NEW approval workflow:
From the "Approval Workflows" page, click the NEW button
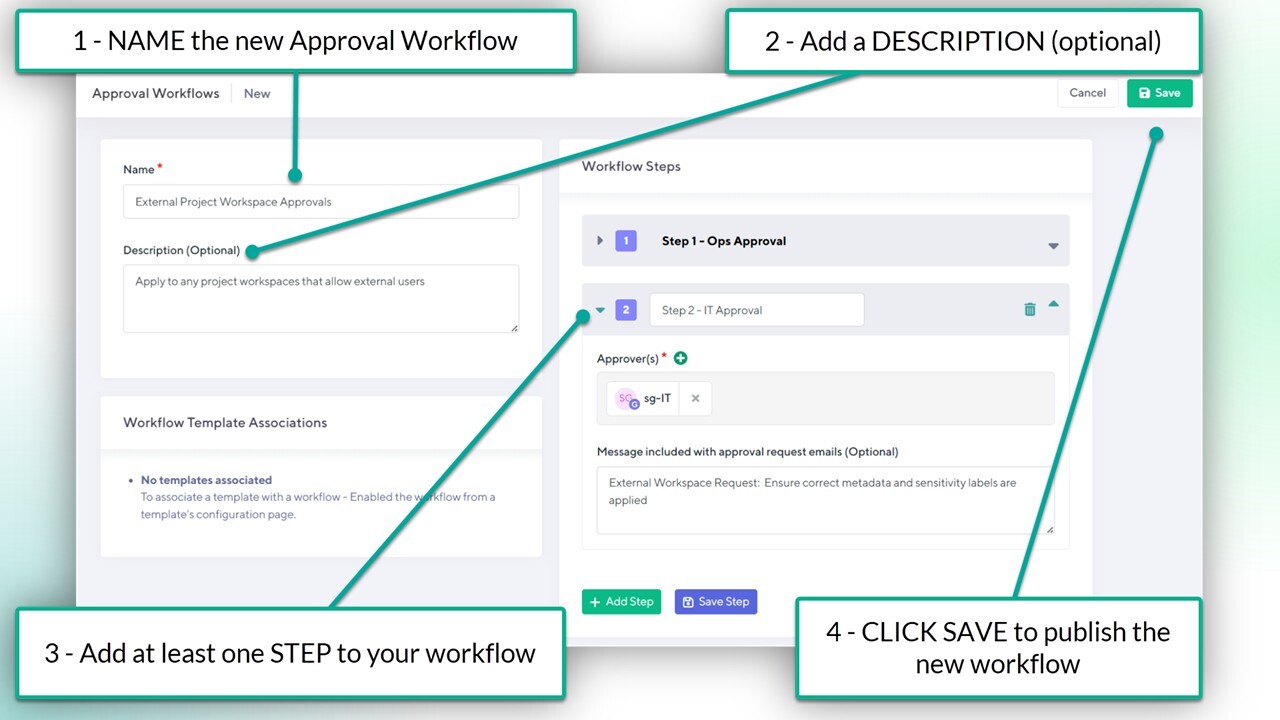
Give the new workflow a name
Give the workflow a description (optional). This will only be seen by admins
For the FIRST STEP:
Give it a NAME
Assign at least ONE approver
Add a custom message to the email notification sent to approvers (optional)
Click SAVE STEP
For additional approval layers, click ADD STEP and repeat steps A through D
Click SAVE to publish the new Approval workflow
How to Assign an Approval Workflow to a Workspace Template
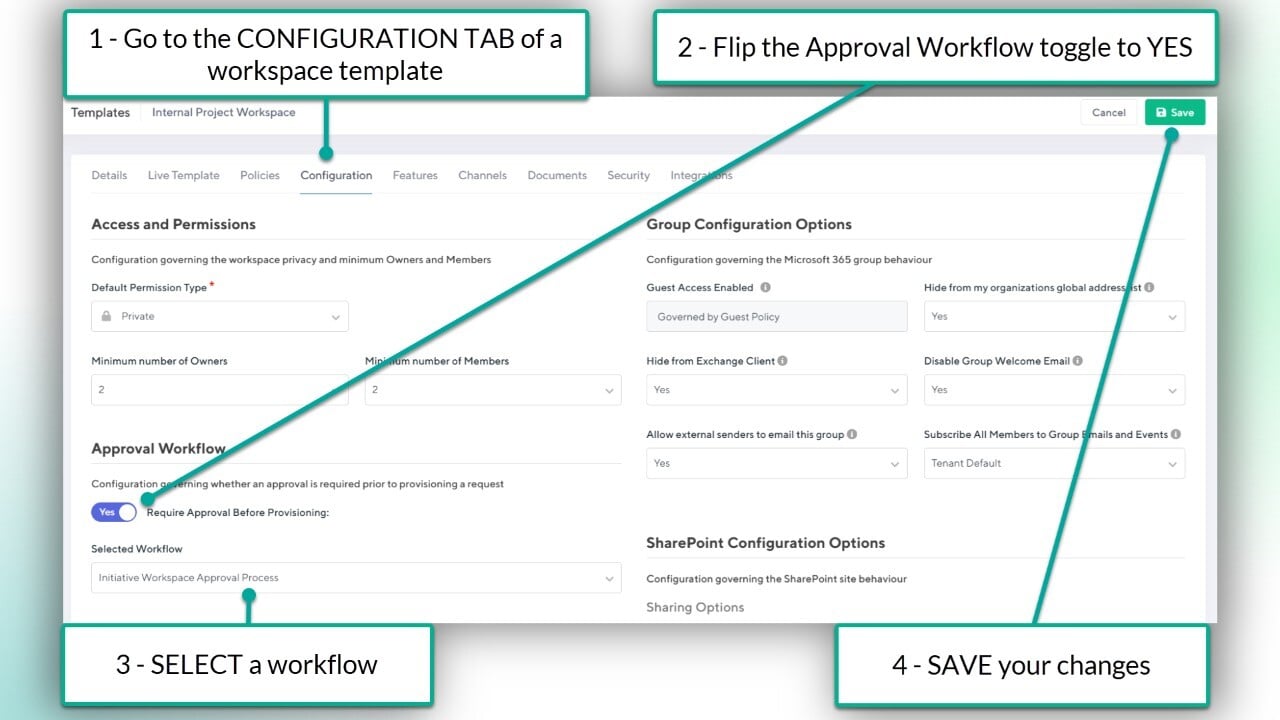
Workspace approvals can be assigned to any TYPE of workspace template from the 'Configuration' tab. This ensures any (or all) workspace requests are sent for approval before provisioning starts.
To assign an approval workflow:
Open the CONFIGURATION tab of a workspace template
Flip the "Require Approval Before Provisioning" toggle to YES
Select a workflow
SAVE your changes
Want to learn how to setup a workspace template?
Check out the article: How to Configure a Workspace Template
How to Approve a Workspace Request
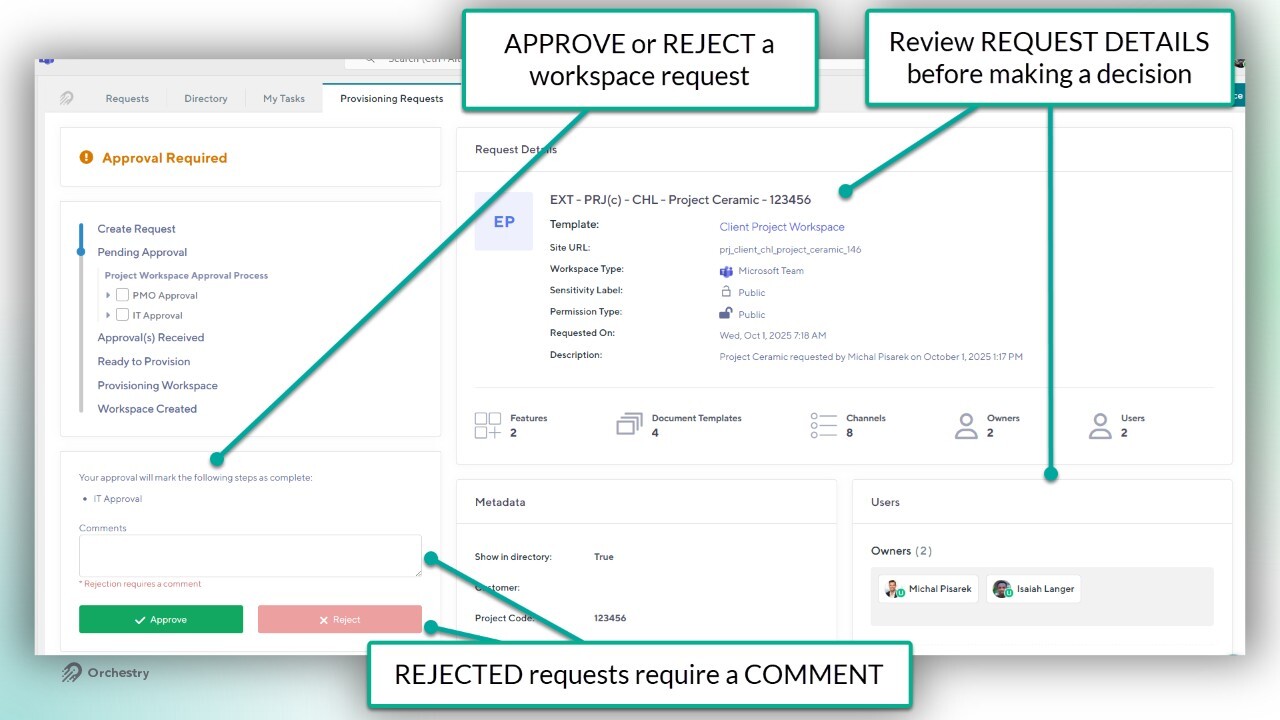
When a new request is received, the approvers are assigned a task in Orchestry. Approvers can:
modify certain fields of the request (web app only),
approve the request, or
reject the request with (required) comments.
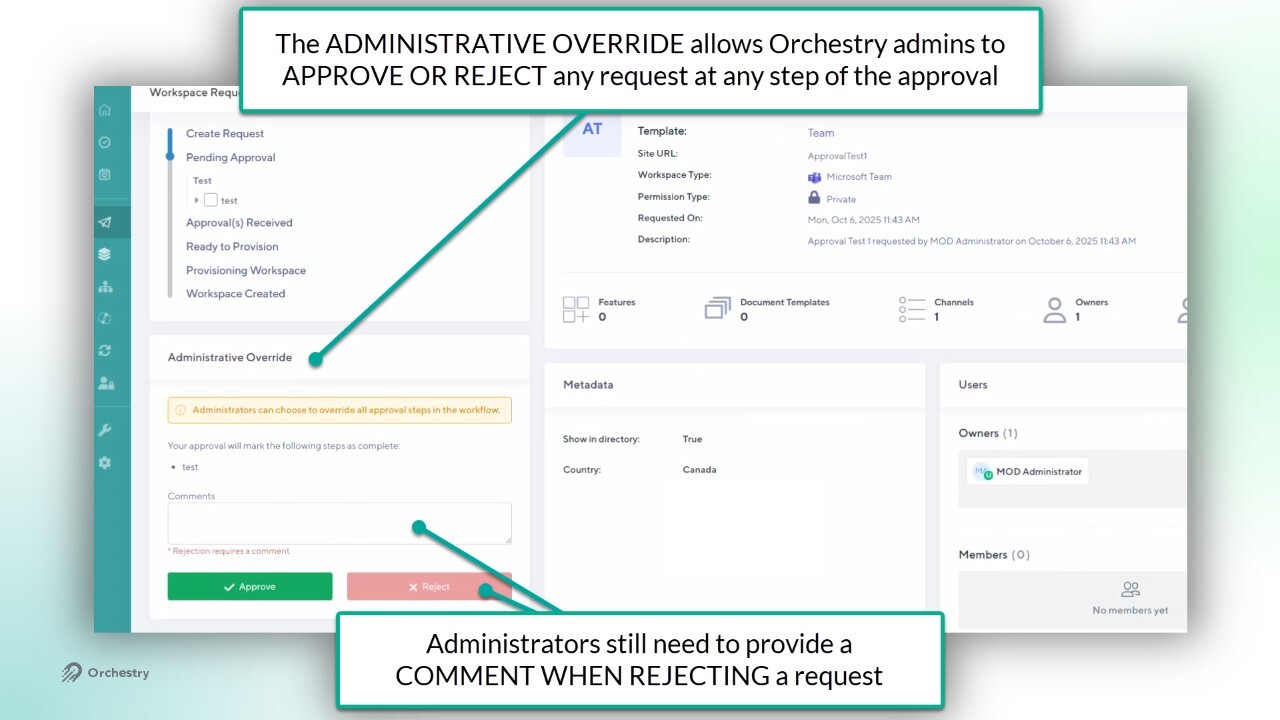
The Admin (Approval) Override
Orchestry admins can view, approve, reject or modify any request without being listed as an approver. To help ensure requests are left pending for too long, admins have access to the 'Admin Override' that will close the loop on approval workflows.
If an Orchestry admin uses the ADMIN OVERRIDE to approve a workspace request, any additional STEPS on the Approval Workflow are skipped and provisioning starts immediately.
Use the standard approval option to respect the approval workflow
Use the ADMIN OVERRIDE to skip additional approvals (steps) and start provisioning
Modifying a Workspace Request
Orchestry admins can modify the following fields when reviewing a workspace request:
Workspace name
Workspace URL
Sensitivity Labels
Permission Type (unless controlled by Sensitivity label)
Workspace Description
Workspace owners and members
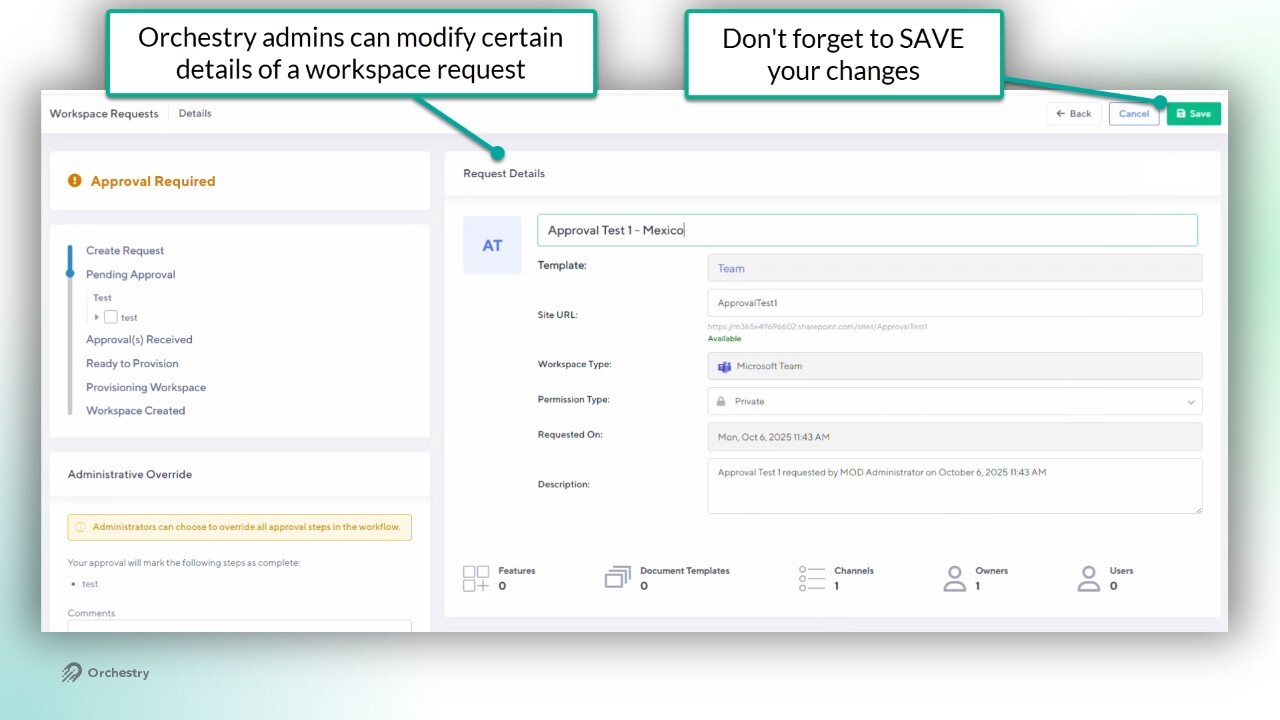
NOTE: the EDIT button is only available in the Orchestry web app
NOTE: Naming policies are NOT enforced at this stage. Admins should take note of the policy prior to making changes.
Want to learn about tasks in Orchestry?
Check out the article: Orchestry Tasks and Notifications Overview
Questions and Answers
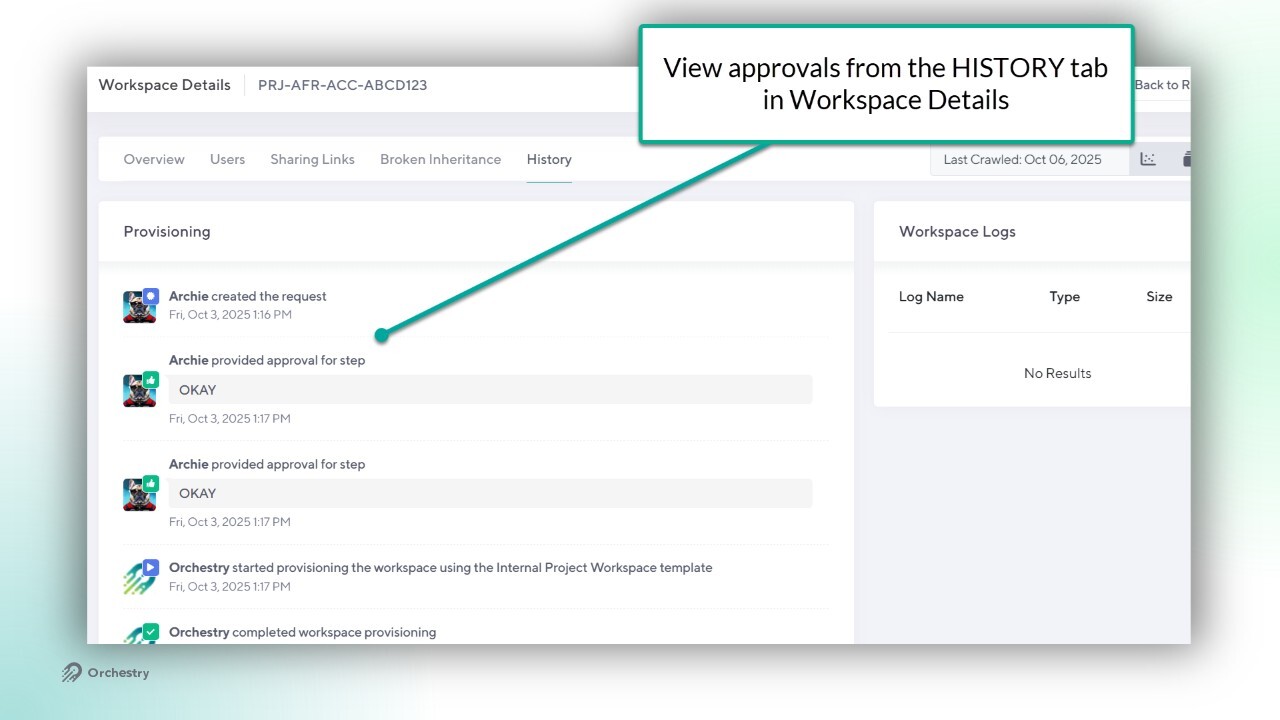
Where can I see a history of approvals?
There are two places you can see approval history:
within the Request Approval (task), and
the HISTORY tab within Workspace Details
Want to learn more about Workspace Details?
Check out the article: Workspace Details Page Overview
Do approvers get sent email notifications for a workspace that they are supposed to approve?
Yes they do. Each person in the approval workflow will get an email notification