
Getting Started
This intended to showcase examples of Orchestry's Custom Feature option. From a product support standpoint, we do not assist in creating or debugging custom features.
Before creating a custom Feature, definitely check out our more introductory articles on:
Feature Proposal
Have you wondered if you can ensure each workspace from a given template gets attached to a pre-existing SharePoint Hub (e.g., every Project attached to a Project's Hub"). You can do that systematically using a PnP feature, or can do so more granularly using Power Automate (not in scope of this article).
Creating a Custom Feature
Because Features leverage and utilize the PnP Framework, there are a huge number of possible use cases for features from custom Lists and Libraries, to SharePoint Page layouts, to applying search settings to sites, and much more.
For this article, we will use the example of creating a feature to associate a SharePoint site to an existing Hub.
Step 1: Configure a Site with the Desired Feature(s) to Extract
- Associate a site in your environment to the desired Hub
Step 2: Extract the Template
- Access Orchestry Management > Tools > Template Files
- Click "Extract New Template"

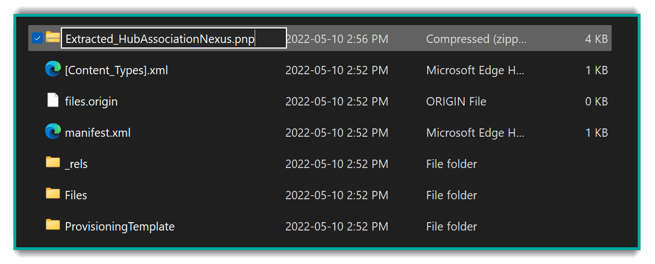
- Name the template (e.g., Extracted_HubAssociationNexus)
- Browse for your SharePoint site where this is already in place
- Under Advanced Configuration
- Under extraction handlers, select only WebSettings
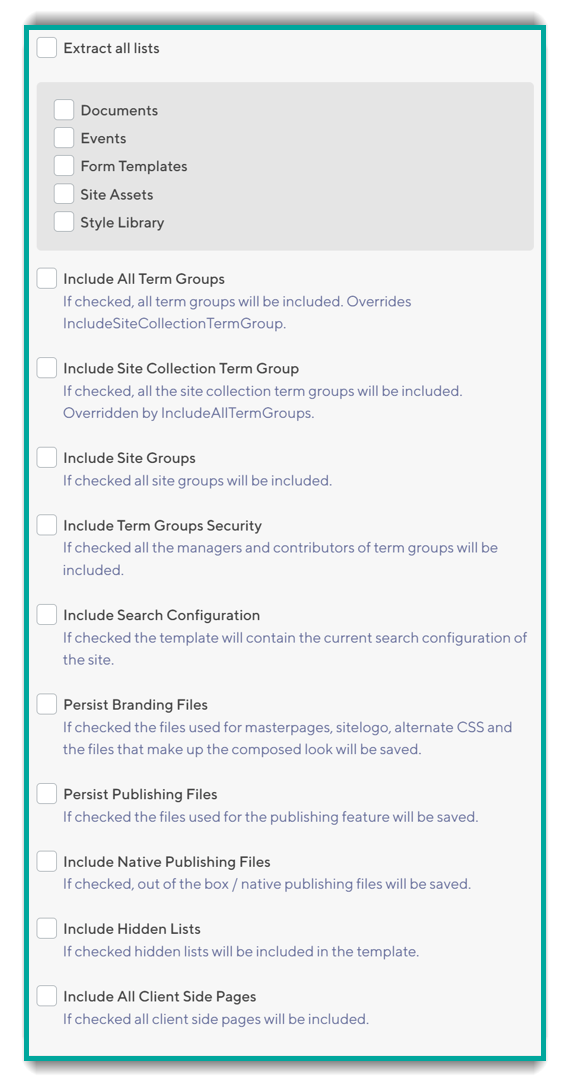
- De-select everything else
- Click Extract PnP File (progress will be displayed while processing)
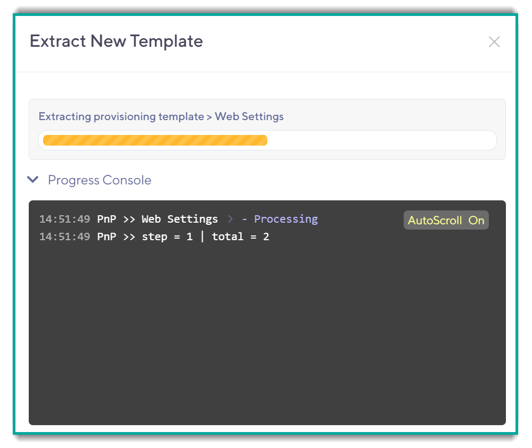
- When complete (if successful), the newly extracted template should appear in the list of Template Files with the name you specified

- Under extraction handlers, select only WebSettings
Step 3: Clean Up the Template
Unfortunately, the extraction we performed was as granular as PnP permits, yet it still contains unnecessary and potentially unwanted information in the Template File.
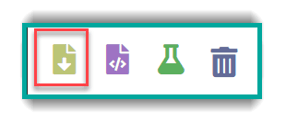
- On the new template file, click the download button
- From your local machine, locate the newly downloaded file and rename its extension to .zip rather than .pnp

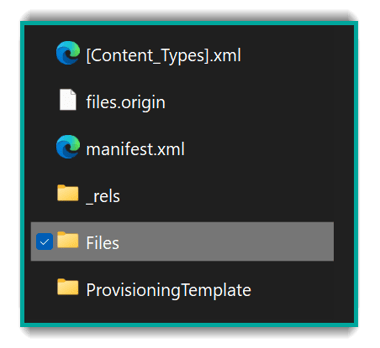
- Extract the Zip Archive
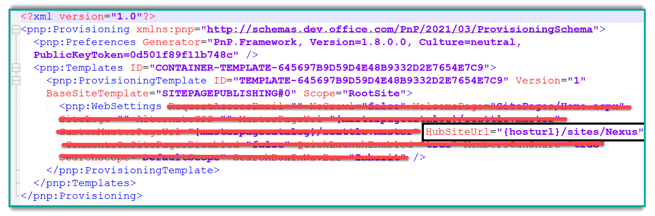
- Navigate to the new folder with the information, open the Files folder and open the .xml file in a text editor like NotePad++
- In the Editor, locate the WebSettings section which is the type of handler we chose to extract. Remove everything other than the desired parameter, which in our case is 'HubSiteUrl'. Ensure to properly close the section and Save the file.
- In your folder, if a .bak file has appeared, delete it.
- Select all the files in the folder, and Compress to Zip, and while doing this, rename the file extension to .pnp.
Warning: Do not change the name of the PnP File as part of this process, otherwise the feature will not work
- Return to Orchestry, deleting the original PnP file
- Upload the new PnP file to Orchestry (with the same name previously used)

Usage
Triggering Features to Apply to Existing Workspaces
Another great feature of Orchestry is the ability to manually apply templates to existing workspaces, which can be very valuable if you want to apply features retroactively. Keep in mind this process is currently not a "bulk" operation, but something that can be done on a workspace-by-workspace basis.
Applying a Feature to Existing WorkspacesAttaching Features to a Template
To attach a new feature to a workspace template, check out the article: How to Configure Features in Workspace Templates